How to Tie a Square Knot
A square knot is a classic knot for any bracelet. The two ends of the cord are passed through a loop and pulled through again. The two ends should now slide onto each other. If you aren’t comfortable doing it with a mirror, you can use a small overhand knot as a backup. When a square knot slips, it can be undone by pulling both ends of the cord.
A square knot can be used to tie a bandage or two pieces of string together. It’s also a great knot for securing two pieces of rope. This knot works best with ropes of the same diameter. However, if the two strings are slippery or bulky, you might want to use another type of knot. So, take a moment to practice tying this knot in order to learn how to tie it properly.
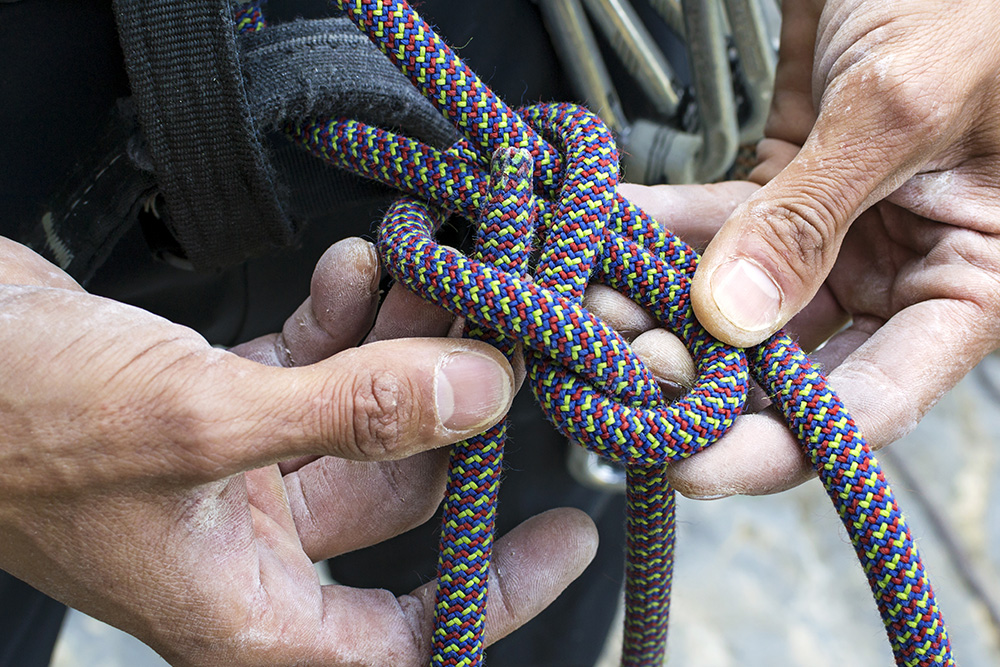
Before you start tying a square knot, make sure you have enough length for both ends. If you’re using a longer cord, you can use two different colors. The strings should be at least two different colors, so you can choose a color to match your outfit. Alternatively, if you’re wearing a brightly colored bracelet, you can use a different colored knot.
How to Tie a Clove Hitch
The clove hitch knot is a common knot for securing ropes to poles or other objects. Its versatility makes it popular in boating and sailing. It’s easy to tie and can be retied several times for the desired length. To use it for a larger diameter rope, you must double-circle the pole. Using two hands, wrap the end of the rope over the pole and bring it back through the carabiner.
A clove hitch is a simple crossing knot that is easy to tie. It’s a great binding knot, but it can come undone if the object being tied to rotates or if the pressure on the line is not constant. This knot is useful for a variety of applications, including macrame and hanging hammocks. It can also be used to secure other items and ropes, but be aware that the strands of thin cords might make it harder to untie the loop.
The clove hitch is a great cross-rope binding knot. Because it’s easy to tie, it’s a great choice for beginners. This knot is useful for securing boat fender or railing. It also allows you to adjust the standing end of the line and is useful for many different situations. The following steps will help you learn how to tie a clove hitch.
How to Tie a Bowline
The bowline knot is a useful knot for many outdoor purposes. Its easy to tie, yet complex structure can pose a hazard. When tied improperly, the rope can come loose, causing an accident or injury. In this article, we’ll show you how to tie a bowline, including how to undo it and how to avoid common mistakes. Hopefully, this tutorial will help you tie a bowline correctly the first time.
The Bowline knot is an extremely versatile knot. It forms a loop in a line that is easy to tie and untie. It’s also easy to tie and can be used as a fixed loop. While it may not be the most practical choice, the Bowline knot has stood the test of time. The strength of the rope retained by the bowline knot is approximately 60%. Unlike other types of knots, this one is easy to untie and reliable.
A bowline knot can be tied using either a left-handed or right-handed person. When you tie a bowline, the free end of the rope should hang downward. When the loop is complete, pass it through the eye on the underside of the standing line and wrap around the loop. Once you’ve completed the knot, you’ll have a bowline that can handle the strain that a heavy rope can cause.
How to Tie the Figure Eight
There are a few things you should know about how to tie the figure eight. First, you should be able to see the knot from two sides. To see the other side, look for the bight on the end of the rope. The bight should be about three feet from the end of the rope. Then, you should stretch the tail of the rope so that it crosses the other strand of the rope. Then, you should wrap the tail underneath the first strand. Put the tail of the rope through the second loop from the bottom to the top. Leave the tail loose so that you can tuck it in and out of the knot.
The figure eight is one of the most popular climbing knots. This is a strong, secure loop that’s useful when climbing and can be tied on the end of a rope. The strength rating of this knot is four, while security and stability are three. The difficulty rating is one, but it’s worth a try if you’re not a professional. Whether you use the figure eight in climbing or as a decorative rope accessory, the knot is always useful.
The figure eight can also be used for anchoring along a rope. Never tie the figure eight in the end of the rope. It’s recommended to clip into a harness using a carabiner. This is a better option than the other two methods. The carabiner is a weak link – it can become cross-loaded during a fall. In addition, the gate of the carabiner carries less strength than the other two parts of the knot. Therefore, kN ratings are based on the total weight of the rope and the free end of the choker.
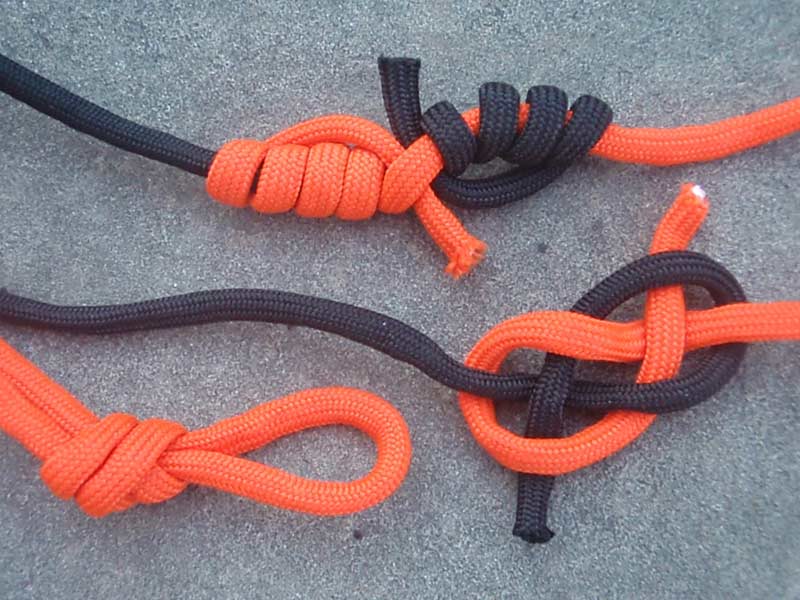
How to Tie the Sheet Bend
The sheet bend, also known as the becket bend or weaver’s knot, is a useful knot for joining two ropes of different diameter or rigidity. It is also an easy and quick knot to tie. In fact, it is one of the six basic knots in the Six Knot Challenge. The best way to tie a sheet bend is to start with a piece of rope of equal size.
The sheet bend is used to join ropes of different thicknesses. The working end of the two ropes should be on the same side. If the ropes are of different thicknesses, they might not be reliable. Thicker ropes slip more easily than polypropylene. For the best results, you must tie the working end of the thicker rope with the thicker rope. The standing end of the thicker line will pull against the working end of the thinner rope.
The sheet bend can be used to join ropes of different thicknesses. The working and stationary ends must be of equal thickness. This type of knot can be used for most non-critical applications. The working end should be longer than the tag end. In addition to the standard sheet bend, the sheet bend is also doubled as the Becket Bend, which has an extra coil around the standing loop. To learn how to tie a sheet bend, you can purchase PRO-KNOT outdoor knot tying instruction cards at Bass Pro Shops.
How to Tie Two Half Hitches
To learn how to tie two half hits, start by holding one end of the rope in the left hand and the other end in the right. Make sure the working end is pointing left. Then, twist the working end of the rope up through the loop and over the load side. Pull both ends together tightly to tighten the knot. Once you have tightened both ends, you are ready to moor your boat or rig.
The Two Half Hitches are an overhand knot that can be used for a variety of purposes. The working end should always pass away from the load side. You can use a bight to consume the excess rope and ensure that the two halves are always tied together correctly. Once you’re done, tie another half hitch and practice in the same direction as the first. Then, tie the knot in the same direction as the other.
In order to tie two half hits, you must bring the working end of the rope down. You should then loop the working end under the standing end. Then, pull the working end through the loop to create a clove hitch around the standing part of the rope. Once you’ve done that, you can tie another Half hitch and feed the excess rope back to the standing part. Once you’ve mastered the Two HT, you’ll be ready to start using it on your fishing lines.
How to Tie a Taught Line Hitch Knot
The Taut-Line Hitch is a simple knot that locks in place under a load. This type of knot is very easy to adjust as the tension on the rope can be adjusted by sliding the taut-line up or down along the main stem. This type of knot was probably invented by sailors to secure the rigging of a sailing ship. This style of knot is also used by space shuttle astronauts to hold the thermal blanket over the Hubble Space Telescope to protect it from the sun’s intense rays.
When tying this knot, make sure to hold the free end of the rope in the middle. This way, you can move the knot up and down to adjust the tension of the line. To make sure the hitch is properly secured, tighten it as needed. If it is too loose, loosen it and try again. This is how to tie a Taught Line Hitch Knot.
When tying a taut-line hitch knot, make sure you are using the free end of the rope. Once the taut-line hitch is securely tied, use the remaining free end of the rope to make a loop. This will allow you to adjust the tension with ease. It is also a great way to secure tent guy lines. When tying a taut-lines, you can be assured that the line will remain secure.
How to Tie a Fisherman’s Knot
The fisherman’s knot, also known as the half-blood knot, is a common fishing knot. This basic knot is also known as a whole-blood knot or improved clinch knot. Here’s how to tie it. The first step is to loop the ends of the rope around each other. The second step is to pull the loops through each other. Then, pull the ends of the rope upwards.
To tie this knot, you will need a long rope with an equal diameter. The first step is to tie the knot in two parts. One of the ends will be the tag line. The other end will be the standing line. Start by placing the ends of the rope parallel. Make sure the knots are loose, but not sloppy. Once the knot is loose, tighten the rope by tying the standing parts of the two ropes in opposite directions.
When you tie a Fishermans knot, you will need two ropes of equal diameter. The knot has two overhand parts. One is tied around the standing part of the other knot, and the second is tied around the other. Be sure to give yourself plenty of slack and tie the remaining two in opposite directions. You should always keep the knots loose to avoid them from slipping.
How to Tie a Water Knot
A simple water knot is a basic technique for fishing. It connects two ends of a webbing piece together. To tie a water knot, lay out both strings flat. Loop one over the other and pull the end back through the loop. This knot creates a pretzel-like loop. Then, tighten the loop by pulling both ends of the string together. The end of the first string should be a little longer than the other so that the second piece of string can pass through it.
The water knot has many uses. It’s used to connect flat or tubular webbing. You tie one end of the rope loosely using an overhand knot. The other end is a looped red strap, which passes along the first red strap and forms the second overhand knot. To avoid slippage, make the loop longer, about ten centimeters. You can use multiple pieces of webbing in a single water knot.
A water knot is a simple knot used by climbers to join two pieces of webbing. It is a common type of webbing attachment. This type of webbing is typically made from nylon or other strong materials. The only disadvantage to the water knot is that it reduces 30-40% of the strength of the line. If you’re a beginner, the Ashley Book of Knots is a good reference.